
 🥰 1")

-20%


Outlet 🎉 Weelye Kids Ride On Car 12V DIY Modified Wires Complete Set Of Remote Control Circuit Borad Wires Switch Gearbox With Motors,Children Electric Ride On Car Accessories ✔️
Original price was: $63.89.$51.11Current price is: $51.11.
- Safe and Secure Shopping
- Protect Your Information, Shop with Safe Payments
- Unbeatable quality, unbeatable prices.
- The best quality products, always.

- Brand: Weelye
- Item Dimensions LxWxH: 7.9 x 7.5 x 6.3 inches
- Theme: Vehicle
- Assembly Required: Yes
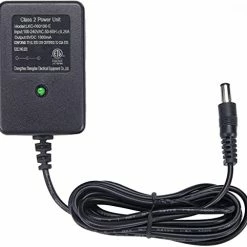
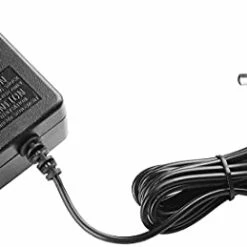
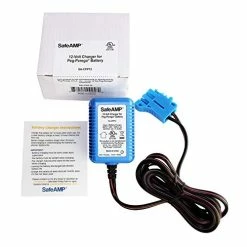
- weelye Children Electric Car DIY Modified Wires and Switch kit (Gearbox with motor, no battery)
- Complete set of accessories : Remote control ,Receiver ( Circuit Board ), Wires, Switch, Pedal, Overload Protector, 2 Pcs Gearboxes, Steering Motor
- Children’s electric car conversion full set of accessories, only need to prepare batteries.
- Equipped 2 pcs 12V550 35000RPM high-speed drive motor gearbox,With high-speed low-speed switch,Easy to Install Repair and Replace
- Remote control with slow start function
8 reviews for Outlet 🎉 Weelye Kids Ride On Car 12V DIY Modified Wires Complete Set Of Remote Control Circuit Borad Wires Switch Gearbox With Motors,Children Electric Ride On Car Accessories ✔️
Add a review
Related products
-20%
Original price was: $14.59.$11.67Current price is: $11.67.
-20%


Original price was: $71.99.$57.59Current price is: $57.59.
-20%


Original price was: $19.99.$15.99Current price is: $15.99.
-20%

Original price was: $52.97.$42.38Current price is: $42.38.
-20%

Original price was: $12.99.$10.39Current price is: $10.39.
-20%


Original price was: $72.97.$58.38Current price is: $58.38.
-20%

Original price was: $49.89.$39.91Current price is: $39.91.
-20%
Original price was: $12.99.$10.39Current price is: $10.39.
trd808 –
The media could not be loaded. The stock system was a single 6v motor. This kit was very easy to install except my daughter’s car did not have a remote control so I am still trying to figure out how to hook up the steering. I hid the fast/slow switch under the wheel well. I switched it to slow for now and just using the remote to kill the car in case my daughter is heading into something or someone. I would have given this product 5 stars but the unit does stop working after 10 minutes. I am guessing it is heating up quickly because of the low gauge wire used and the poor connections on the motors. My next step is changing the wires and soldering the connections on the motors.
Jaron Leach –
I was a little leery with the lack of reviews but it was a great value for what you are getting so I took a shot and both one for both of my kid’s ride ons. Upgrading from single motor 6v on both to this dual motor 12v setup. Both cars seem to have the space to add the second and I am moving one battery from on to the other an running in series to get to 12v and giving the other a new 12v battery. I haven’t got it installed yet but I have put it all together on my workbench and everything looks to be functioning as expected. I will update after getting it installed.Update:I have it installed on one and am working on the other. It has all worked well. The steering motor hole is very small and is too small of a fit for either of the cars I am working on. I had to drill it out to be bigger and I had to push the limit of how big I could go without making the walls too thin. The two speed settings don’t seem too different too me right now. Will try that out more later. Wires could be longer, I had to splice to make it longer in areas. Still overall a great deal for what you are getting.
Zac Morrison –
I got it all set up and wired and for some reason it’ll be going along and cut out on me using the remote then I let off the go button and it goes again I don’t understand why it cuts out updated the switch had a loose wire
Adam –
Had to use my old foot pedal and gear shifter but it was an easy install and works great. The wires are heavier guage then the original.
So¹³Cal –
I thought this would be a great backup in case something went wrong with like little girls power wheel or my son’s John Deere tractor. Unfortunately the control box does not match up with the current connections where the control box with this assembly is two prong and the one I need is three prong.This assembly harness would possibly be great for an older Ride along Joy with manual buttons.
Jonathan Crouch –
Seems straight forward except the steering…. Anyone figured it out or have pics of how they did the steering?
Brydon –
The media could not be loaded. Definitely wish some instructions were involved, and I wasted a lot of time thinking I needed to use their components, but in the end it really was nearly plug and play.My son has the new version of the Raptor (search Ford F-150 Raptor 12V Battery Ride-On Toy, Carbonized Grey by Huffy). To make it work I did the following (cutting out all of the wasted steps:1) Disassemble the components in the hood and take the hood off, taking out the circuit board and battery.2) Disassembled the battery housing and took off the old female spades connectors (use a small flat tip to wedge in and bend up the clips so you can slide them off).3) Hook up the new battery connection and plug in all the factory connectors plus the new steering wheel connector to the new circuit board. Turn on remote, turn on the truck, and make sure the remote works with everything (yes I was able to use the factory motors, the factory switches, and the factory wires. Only thing I used form the kit was the steering wheel motor, the new circuit board, and battery connection/charger port even that last part isn’t probably necessary if you’re really handy with electronics but I am not)4) Follow the directions on the remote to sync it. Mine synced second try after I took the batteries all the way out, not just powered it off.5) once you know it works, take everything back off the circuit board/out of the engine bay except the new steering motor cables ( I straight up cut the wires for the new switches and slid the wiring out so I only had the black sleeve with the two steering motor cables in it, the thick brown and blue wires (don’t cut these!), not to be confused with the blue and brown wires that also go to the switches. Run these cables (the blue and black) through the firewall (the side with the thick clip. The small side goes into the circuit board)6) take the steering wheel off and the bolt holding the Red part on. Then flip the truck over. I did this by setting it on two bar stools.7) Take apart the steering column housing. 6 screws then two more, then two on the column (same size and style as the top). Also take off the front axle (one bolt on the column and two by the tires).8) here’s where I had to be creative. I lined up the steering motor (the motor part faces out towards you and goes towards axel side, you’ll know you have that right because the hole doesn’t even remotely line up if you don’t) put the steering column back in, and saw where plastic made contact with plastic, then used my dremel to file it away until the new steering motor sat flush with the housing. I had to grind off two screw stubs, part of the motor attachment on the top right (if facing from front of car), and then grind down into the hosing on the bottom where the two screws are that hold the top and bottom of the motor together. I kept at this until the motor sat pretty parallel and the steering column is as not impacted or caused to be at an angle.9) screw the motor into the housing at this step so you have screw holes (I used 2 inch wood screws because that’s all had, it works and doesn’t punch through the “fire wall”) then take the screws off again.10) put the housing in and install it. Connect the steering column to the new motor then run that through the housing/fire wall and screw down the motor, being sure to route the new steering motor wires through into the housing and to wear you can connect the motor. The motor wires (green and yellow) clip can be routed around and under the motor housing to be between the motor and the steering housing. Not super pretty but it’s out of the way. I’m thinking about heat shrinking this or something so it’s water resistant.11) flip the truck back over and plug everything back into the circuit board. Turn on truck and press remote. It should work. You can also test it with it upset down (I tested it a ton as I went through process but it works so well you don’t really need to).12) bundle everything back up and you should be good to go!I probably missed something but I really hope that helps. Leave a question if you need assistance and I’ll try to help. Again I only used the steering motor, the circuit board, and the battery connection from the kit. I did not use the new motors or switches so I didn’t have to take apart the rear axle, the “drive train” cables, or the dashboard.One thing about this kit is if you do have to use the new motors, it’s set up so the battery is located next to the motors. On my son’s truck the battery is in the hood, so to make this work I would have had to install the battery in the bed or lengthen the battery cables. I got around this by using the existing cables and clips since it all fit into the new circuit board.Also; this motor/remote doesn’t have the “auto center” like nicer remote control cars do. Meaning when you turn left the steering stays left and does not recenter. So you have to constantly fiddle it to keep it straight. I am hoping by finding a new remote that syncs to the new circuit board that will fix the issue I’ll update if I find something.
Renée A. Leoncini –
No directions other than a picture